

How To Add Blog Feed To Another Tab Wix
Nov 09, 2021
Hasna A.
12min Read
How to Transfer Wix to WordPress – A Beginner Guide
Even though Wix is a great website builder, it comes with many limitations. As your website grows, you may be looking for the kind of flexibility and control that WordPress brings to the table.
While transferring between these web platforms may seem complicated at first, we're here to help. In this guide, we'll be going over the details of how to switch from Wix to WordPress.
We'll break down two semi-automated migration methods – the RSS feed and the website migration plugin method, going over them step-by-step.
Here's a brief rundown of the overall process:
- Purchase WordPress hosting and the domain name you want to use
- Set up your new WordPress website
- Customize your WordPress website
- Import your blog posts from Wix via RSS
- Create your Wix pages on WordPress
- Add your images to WordPress
- Redirect your Wix site to WordPress
- Do a final site run-through
Getting Ready for the Conversion
The length of the upcoming process depends on the size of your existing Wix website, your current SEO settings, and your familiarity with WordPress.
If you're a complete beginner to the platform, learning more about WordPress before proceeding will make the transition smoother.
First, we'll walk you through the two steps you need to take before migrating from Wix.
1. Purchase New Hosting
While Wix services already include web hosting in their packages, WordPress is self-hosted. This means that moving your website away from Wix to WordPress will require purchasing a web hosting account. You'll also need a domain name if you don't have one already.
Choosing a high-quality hosting provider should be a priority to ensure the best performance for your site.
At Hostinger, we offer WordPress Hosting plans that are reliable, beginner-friendly, and optimized for WordPress.
Our WordPress Hosting plans start at $1.99/month and, if you purchase at least 12 months' worth of hosting, you'll receive a free domain for one year.
However, if you've already purchased a domain name through Wix, you can transfer the existing domain name from Wix to Hostinger.
2. Setup Your WordPress Site
After you've secured a web hosting account and pointed your domain name to the new servers, it's time to start building a home for your website.
The following steps will walk you through the installation, setup, and customization options of your new WordPress site:
2.1 Install WordPress
How you install WordPress will depend on the web host you chose.
The easiest way to install WordPress is by using a 1-click auto-installer. If you went with Hostinger, this tool is available in the hPanel. Simply navigate to Website -> Auto Installer -> WordPress and begin the installation process.

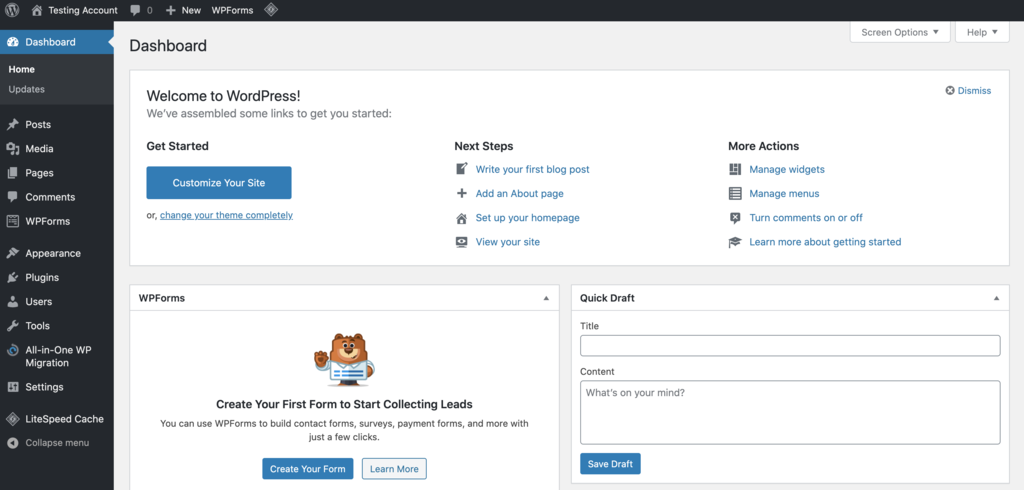
Once you've installed WordPress, log in to the WordPress dashboard. You can access it by adding wp-admin at the end of your domain name. Alternatively, if you're using hPanel, you can head to WordPress -> Dashboard and click on Edit Website.
2.2 Set up Your Site
You can customize every aspect of your site from the WordPress dashboard.
Before you start delving any further, however, let's optimize a few settings.
First, navigate to Settings -> Permalinks and select Post name. This will change your URL structure, making it more readable and search-engine friendly.

The next thing you want to do is adjust your website's title and tagline. To do this, navigate to Settings -> General.
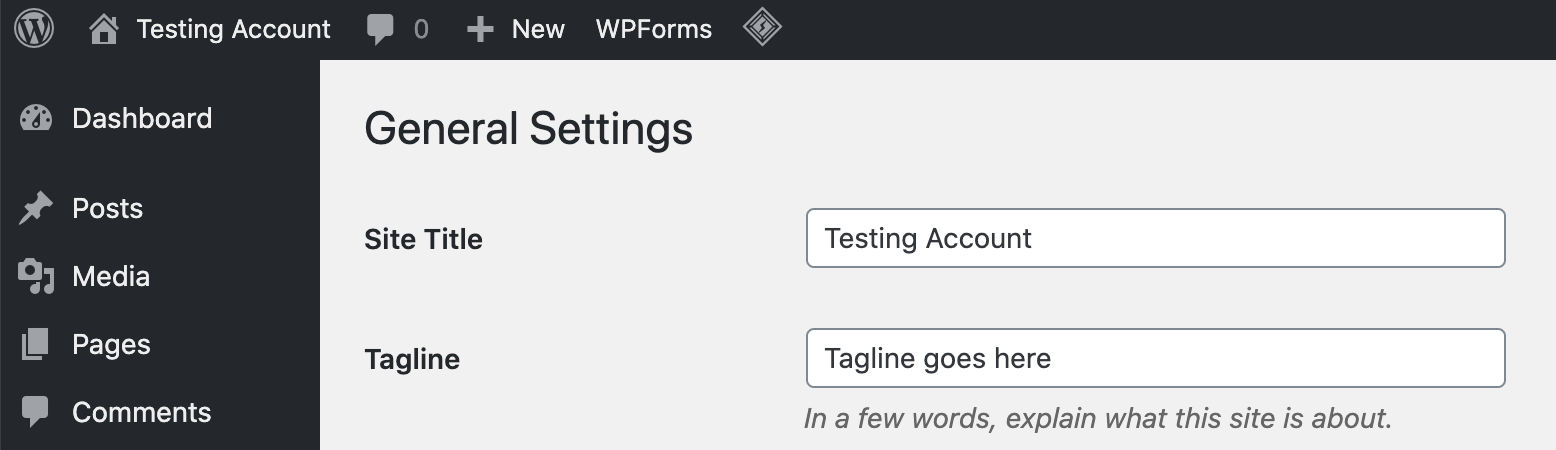
At the top, you'll see two boxes, Site Title and Tagline. Change these to reflect the current name and tagline of your existing site.
These two changes will be enough to get you started, but feel free to adjust other settings to your liking.
2.3 Customize Your Site
You can customize your WordPress website further by using themes and plugins.
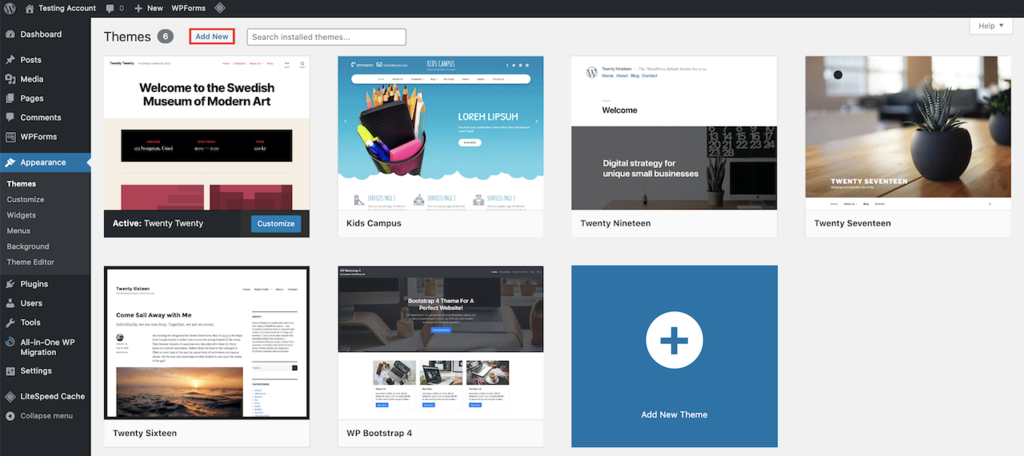
There are tons of free WordPress themes available to install right from your dashboard. To get started, navigate to Appearance -> Themes -> Add New. Here, you'll be presented with the official WordPress theme directory, where you can download and install free themes for your website.
In addition to the themes you'll find here, you can also find premium selections on other marketplaces. Paid themes will generally be of higher quality and offer more features, dedicated support, and customization options.
If you're looking for a paid theme, check out the following marketplaces:
- ThemeForest
- StudioPress
- Elegant Themes
- WordPress Premium Theme Directory
Further customizing your theme is quite simple. Navigate to Themes -> Customize to make the changes you need. Feel free to read up on your theme's documentation for more extensive information before making any tweaks.
Keep in mind that it might not be possible to replicate the exact website design you had on Wix.
We recommend looking for a similar-looking theme and a drag-and-drop builder plugin that supports it. The experience provided by page builders like Elementor, Divi, Astra, or WPBakery is similar to that of the Wix editor.
You can edit each element on your page and move them around without having to touch a line of code, which will make it easier to adapt as a fresh WordPress user.
Now that your new WordPress site is set up and customized, it's time to transfer the content of your Wix site to WordPress.
Transferring Your Content From Wix to WordPress
Unfortunately, there's no official way to transfer your website's content from Wix to WordPress.
Depending on the size of your original site, manually recreating your content can take too much time and effort. Fortunately, there are methods to automate some of the processes when migrating content from Wix to WordPress.
In this guide, we'll explore how to transfer content to WordPress using the site's RSS feed and a migration plugin. We'll walk you through each method in the following sections.
The first method of transferring your site's content is via RSS.
This method is only applicable to the blog posts on your Wix website, and not the pages.
By importing your Wix RSS feed file, you can automatically duplicate every existing blog post to your new WordPress site.
Keep in mind that this approach will only work for older Wix blogs. Newer blogs no longer have a working RSS feed. Therefore, if you built your Wix site recently, you should skip this method and use the migration plugin instead.
If you are using an older version of Wix, however, follow this step-by-step guide:
First, you'll need to open your existing Wix RSS feed file. To do this, add /feed.xml to the end of your Wix site's URL.
For example, if your site's domain name or URL is mydomain.com, type in mydomain.com/feed.xml or mydomain.com/feed into your browser's address bar.

This will also show you if your current Wix site has RSS enabled or not. If you see a page full of code, it means that your site still has RSS, and you can proceed to the next step.
With the RSS page open, right-click on the page and select Save as.
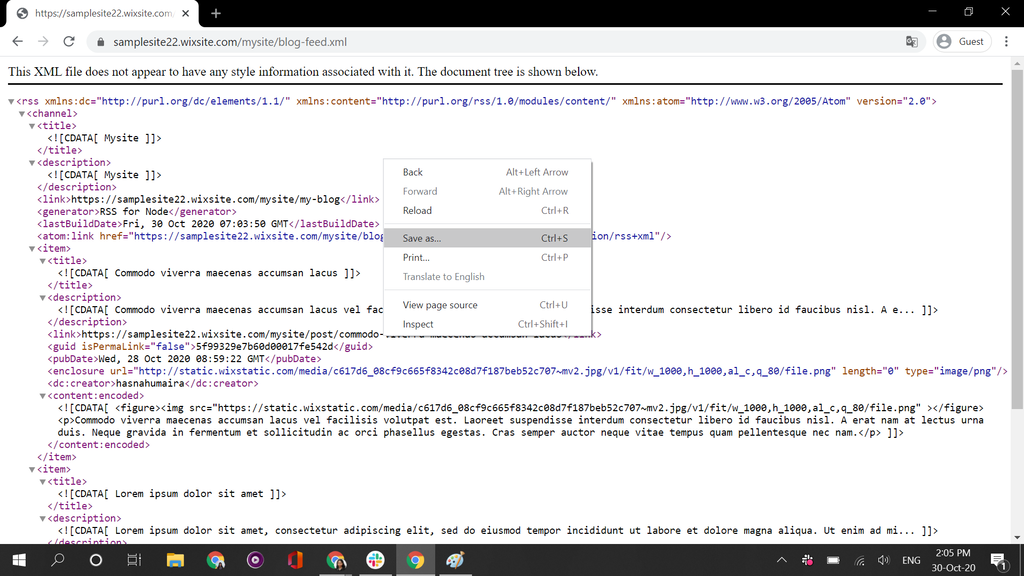
Depending on the browser you're using, you might have to rename the file extension, as it could be saving it as a .txt file. Be sure to change the file extension to .xml and save it somewhere safe.
3. Import Into WordPress
Next, we'll use the built-in RSS importer offered by WordPress to transfer the posts.
- Head over to your WordPress dashboard and navigate to Tools -> Import.
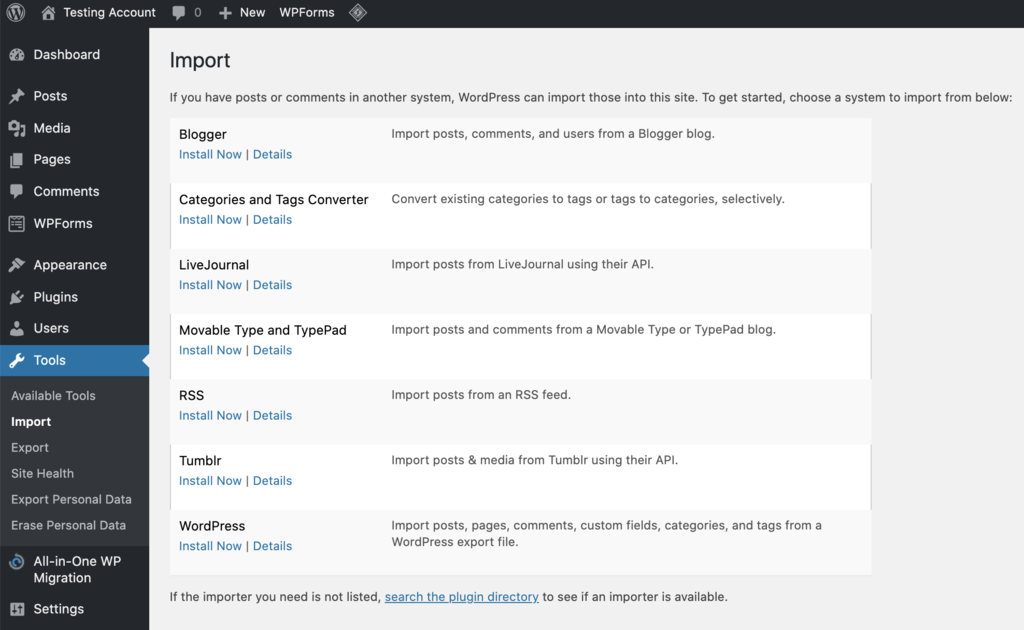
- Find the RSS importer and click on Run Importer. If you haven't installed it yet, click Install Now. Then, Run Importer will be available.

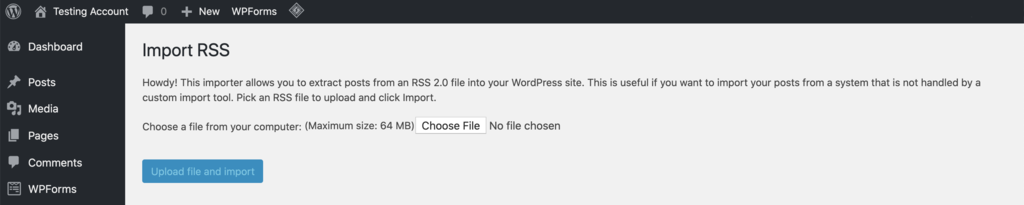
- On the next screen, you'll be able to upload the .xml file you've downloaded. Once you select the file, click Upload file and import.
- Once that's finished, you'll want to check if your posts have been correctly migrated. Navigate to Posts -> All Posts, and see if all your existing posts were transferred.
Keep in mind, that there might be some formatting issues to clean up, but hopefully, all your posts are now on the new blog.
The RSS migration only transfers your blog posts. If you have pages on the Wix site, your only option is to transfer them manually.
4. Add Pages to WordPress
Since there is no automated method of migrating Wix pages to WordPress, you'll have to copy and paste.
Open your existing page on Wix and copy its content. Then, go to your WordPress dashboard and navigate to Pages -> Add New.

Finally, paste the copied content into the new page. You'll have to do the same for each page you have on the site until all of them are copied over to WordPress.
The new Gutenberg editor might break up the content into blocks, so it might take a bit of time and effort to get the page to look the way you want it to.
If your pages' design is more complex, you might benefit from recreating the pages using a drag-and-drop page builder.
One of the most popular page builders is Elementor. Once you've activated the Elementor plugin, go to Pages -> Add New -> Edit with Elementor. You'll be redirected to the Elementor editor.

Open a page from your Wix site in another tab and start recreating it using Elementor.
There are many widgets to choose from, including icons, images, videos, and call-to-action buttons. Once you select a widget to add a particular type of content to a page, you can further customize it to fit your needs.
Some additional widgets can be unlocked by purchasing the Pro version of Elementor, which starts from $49/year.
5. Migrate Your Images
The RSS feed migration will copy your content, but your images will still be hosted on Wix, so they won't work after the original site is deleted. To fix this issue, you'll have to import the images to WordPress.
The first option is to upload the original images from your computer to the WordPress media library via Media -> Add New. We recommend this method because the original files on your computer will have the best quality.
If you don't have some or all the original images saved on your computer, simply save them from Wix and upload them to WordPress.
Once you've uploaded the images, don't forget to insert them in their respective posts and pages. On the post or page editor, select Add Media and choose the image you want to insert.
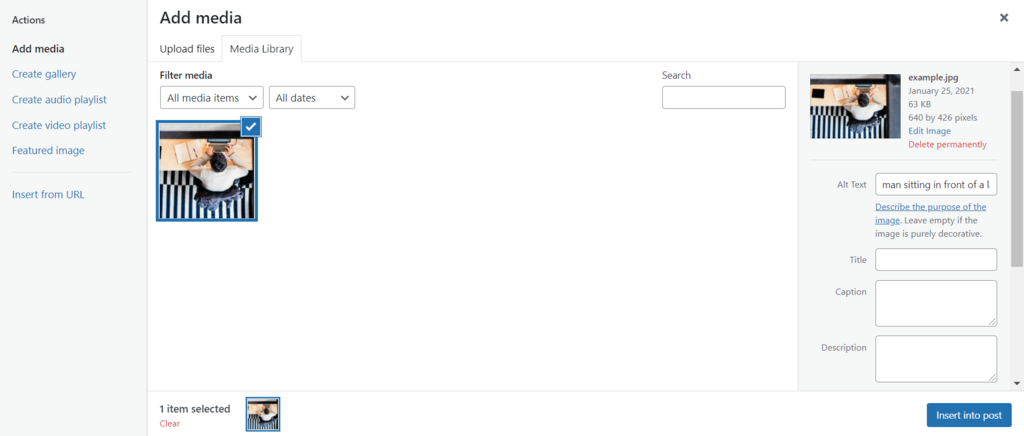
Feel free to resize and add alt text to each image to improve your SEO. Select Insert into post to add the adjusted image.
Use the CMS2CMS Plugin for Automated Migration
CMS2CMS is a website migration plugin that supports 150+ platforms, including Wix and WordPress. It can help automate a large chunk of the migration process.
Due to Wix's limitations, CMS2CMS can't instantly duplicate everything to WordPress. However, it can still save a lot of your time, especially if you have a lot of content on Wix.
Keep in mind that it will only transfer the content, not the design. You still need to use a page builder to recreate the design on WordPress. Additionally, it will duplicate the pages on your Wix site as posts, so you'll have to change them to pages manually.
CMS2CMS is a paid migration service. How much you'll have to pay to transfer the content from Wix to WordPress will vary depending on the kind of website you have, its size, and its complexity.
Fortunately, CMS2CMS offers a free trial to showcase a preview of the finished result. Before paying, you have the option to check whether the service will be worth the price.
To avoid any potential issues, make sure to back up both your Wix and WordPress websites before using this plugin to migrate your site's content. Having done so, follow the steps below.
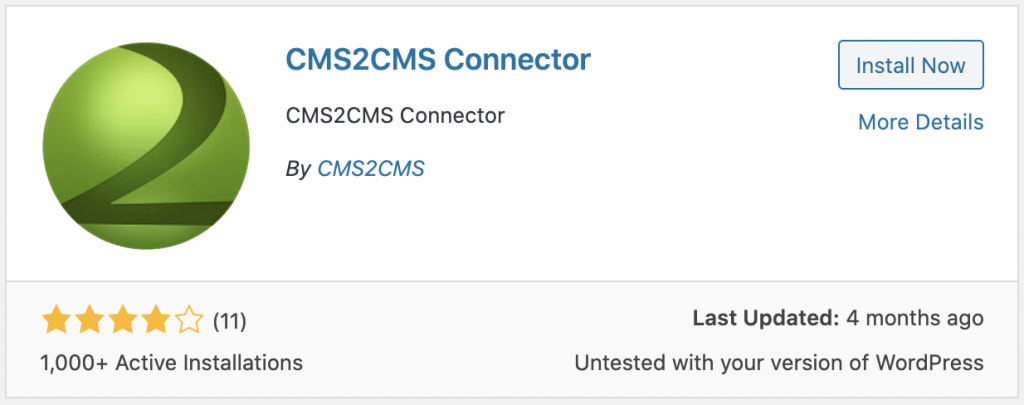
1. Install the Plugin
To install the plugin, navigate to your WordPress dashboard and go to Plugins -> Add New. In the search bar, type in CMS2CMS. Then, click Install Now and Activate.
2. Create an Account
Open the plugin by navigating to Plugins -> CMS2CMS Connector.
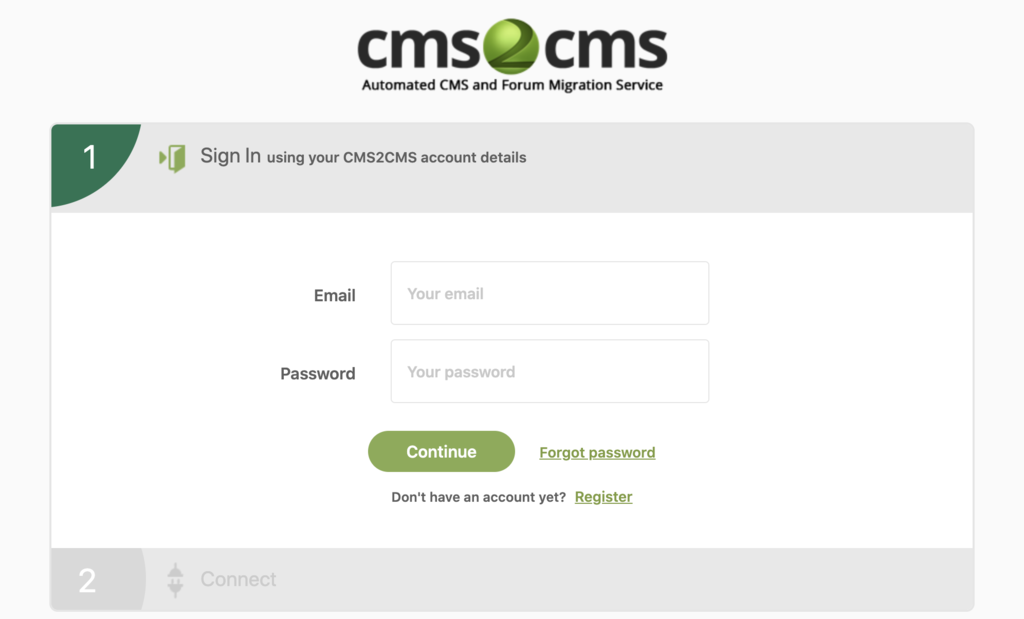
Next, create an account, or log in to your existing account.
3. Connect Your Wix Site
After logging into your CMS2CMS account, it will redirect you to its dashboard, where you can connect your Wix and WordPress sites.
Select the correct platforms from the drop-down menu and enter the URL of your Wix site and the new WordPress site. If you haven't created a new WordPress site and are just trying out the service, choose to Migrate to our test site instead.
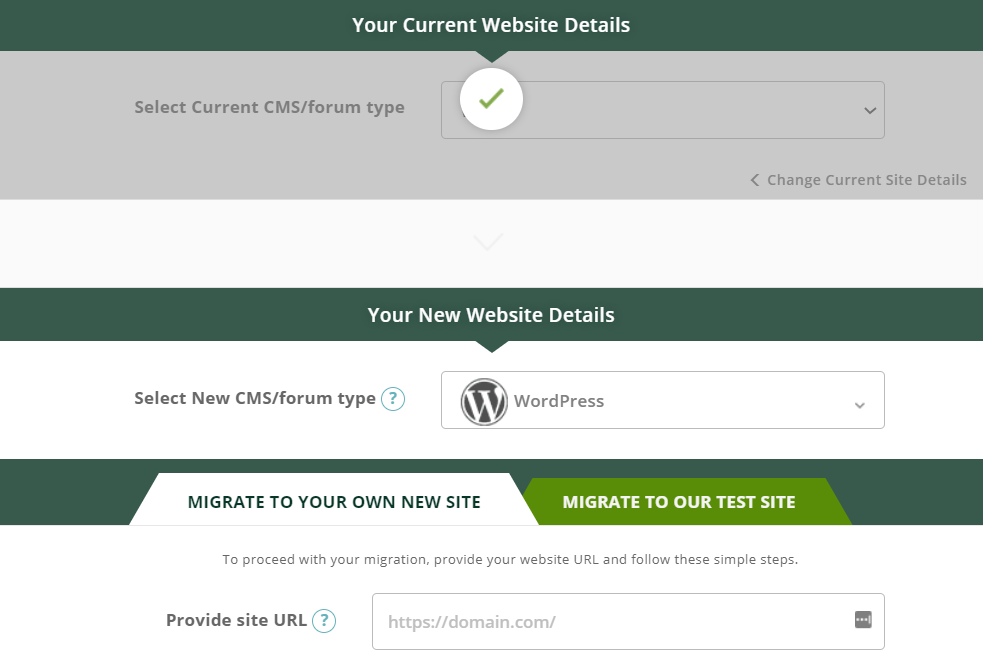
Once you have filled in the required fields, select Verify Connection to proceed with the migration.
4. Run the Migration
In this step, you'll be able to adjust the migration settings. Choose the content you wish to migrate or exclude.
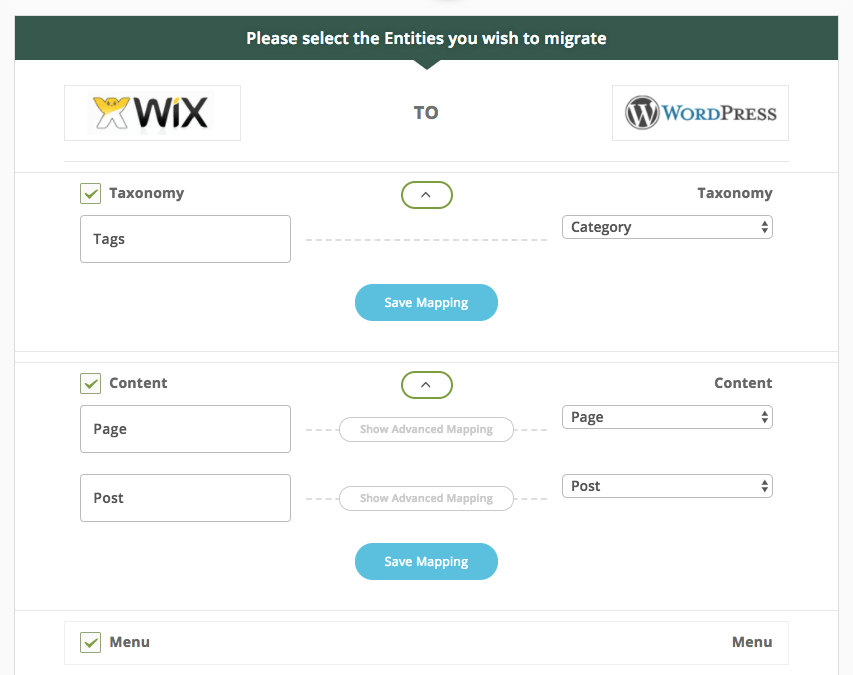
For an added fee, you'll have access to more migration settings, such as:
- Migrating your metadata
- Importing images
- Setting up 301 redirects
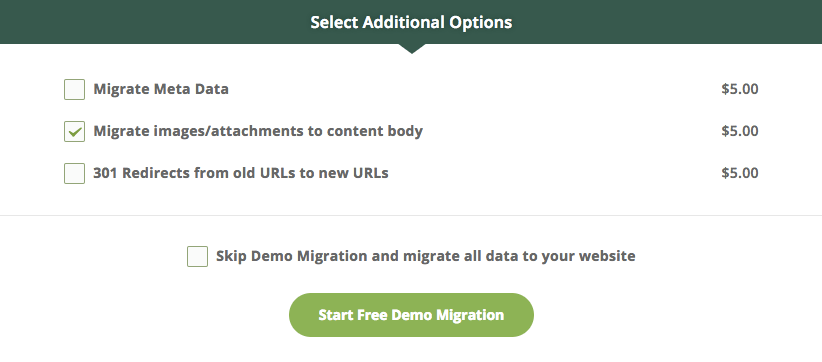
Next, click Start Free Demo Migration. It will give you a report that shows if there are any migration errors.
Once the demo migration is complete, you will be able to look at a preview of the migrated website and the WordPress admin area.
You'll also receive a price quote. Before finalizing the purchase, you have the option to add more migration features or get migration insurance in case anything goes wrong during the process.
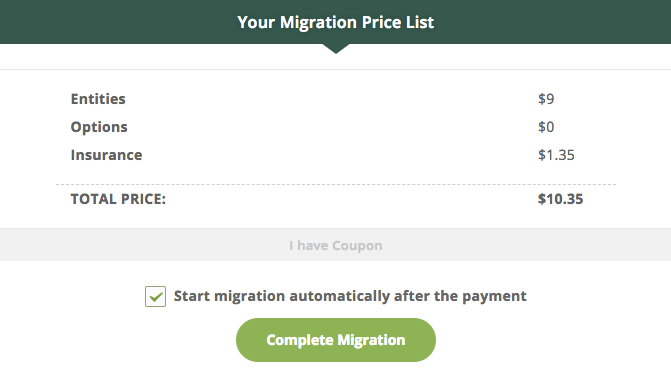
Click Complete Migration to migrate your entire Wix site to WordPress. Once your payment has been processed, CMS2CMS will immediately begin the migration process.
Wix to WordPress Migration Finished. What's Next?
Now that you have successfully migrated from Wix to WordPress, it's wise to do some updates and adjustments to get the most out of the site before it goes live.
Here are six essential tasks you should complete before launching your WordPress site:
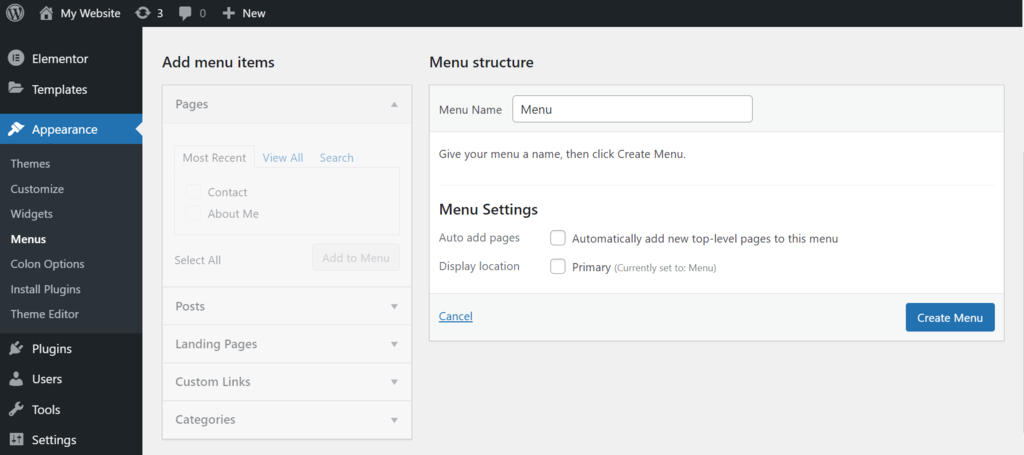
Having a menu or navigation bar will help visitors explore your site with ease, making for a much better user experience.
1. Head to the WordPress admin area and navigate to Appearance -> Menus. Give it a name and click on Create Menu.
2. Select the pages you've created on the left and click Add to Menu. Once it is complete, click Save Menu.
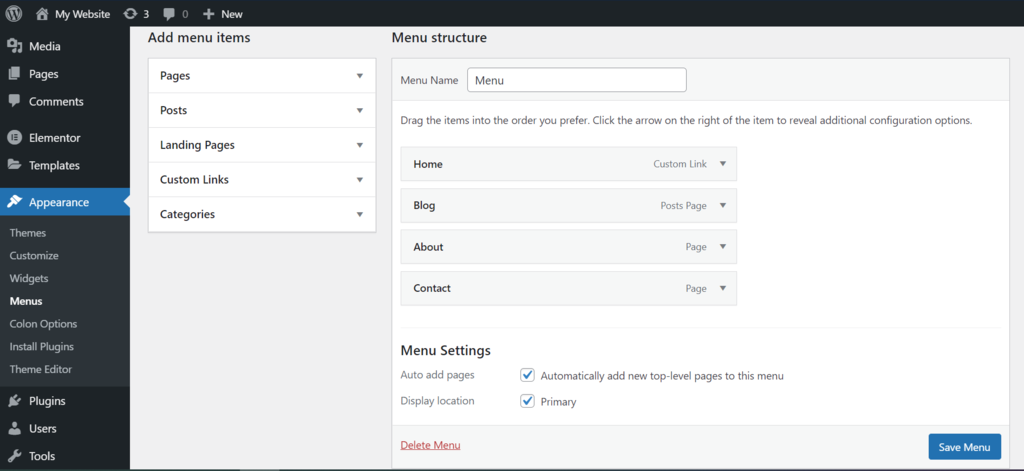
3. To change the menu's placement on the site, select the Manage Locations tab. Depending on the theme you chose, you'll be presented with different options to place the menu. If you want to display it at the top of the site, select Main Menu or Header Menu.
Redirect Your Wix Site to WordPress
Next, you need to redirect your old Wix website to your new WordPress site. This way, whenever someone lands on your old site, they will be immediately taken to the new one. It is an effective way of making sure you don't lose your existing audience due to the migration.
Unfortunately, if you built the Wix site on a subdomain, you can't implement the redirect feature. If you used the CMS2CMS plugin and paid for the additional redirect feature, however, this step is already done for you.
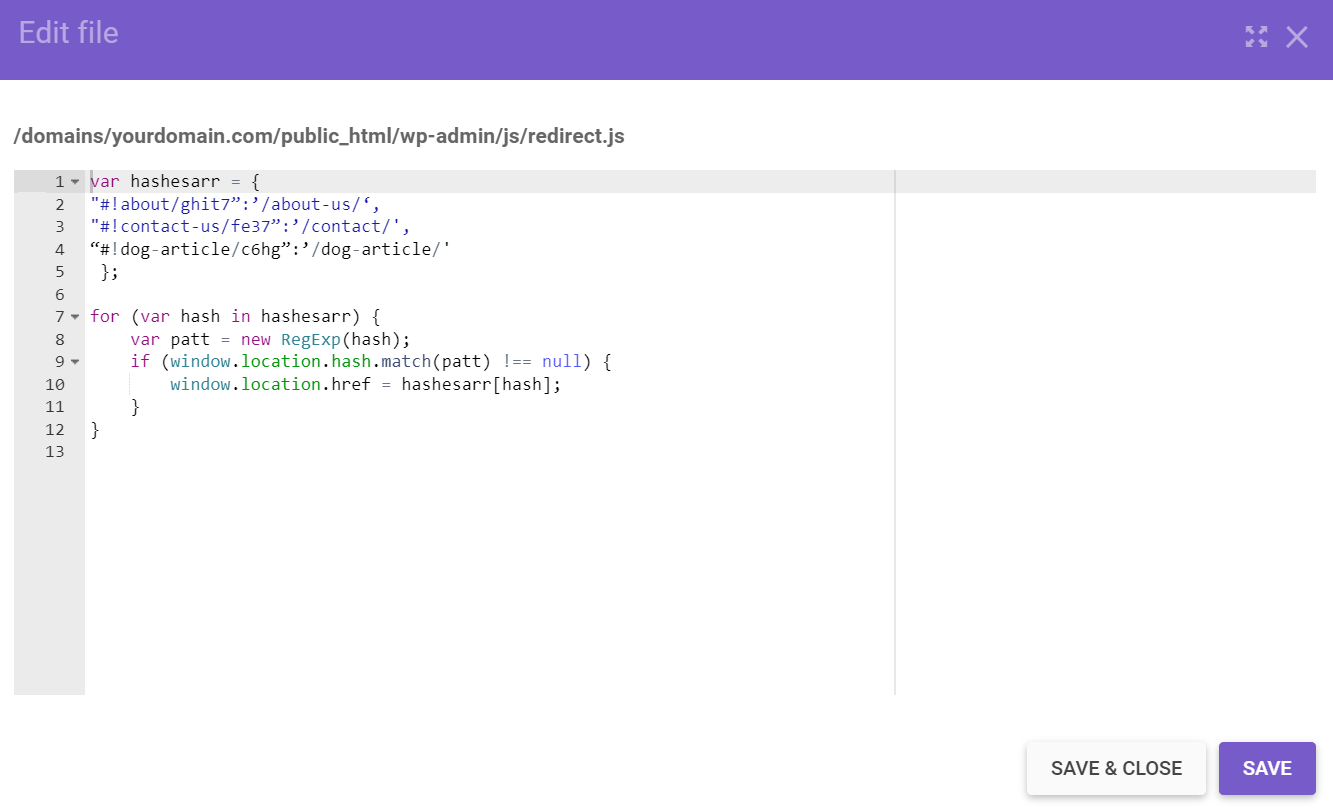
To apply the redirect, first copy the following code into your text editor of choice:
var hashesarr = { "#!about/ghit7":'/about-us/', "#!contact-us/fe37":'/contact/', "#!dog-article/c6hg":'/dog-article/' }; for (var hash in hashesarr) { var patt = new RegExp(hash); if (window.location.hash.match(patt) !== null) { window.location.href = hashesarr[hash]; } } Our example included three URLs in the same format. The first part of the string, #!about/ghit7, should be replaced with your old Wix URL, and the second part, /about-us/, with the URL of the new WordPress page.
To redirect all pages from Wix to WordPress, you'll need to manually add all the URLs to the file using that same format.
Next, save the text file as redirect.js and upload it to the public_html/wp-admin/js directory on your website's server. Use the File Manager on your hosting account or an FTP client to upload the file.
Lastly, you'll need to edit your functions.php file so that the file you've just created will run. Locate the functions.php file within your theme folder or navigate to Appearance -> Theme Editor -> Theme Functions from your dashboard.
Open up your functions.php file and add the following code:
function wpb_wixjs () { wp_enqueue_script( 'wixredirect', get_stylesheet_directory_uri() . '/js/redirects.js', array(), '1.0.0', true); } add_action('wp_enqueue_scripts', 'wpb_wixjs'); Save the changes, and your redirects should now be in place.
Set Up Yoast SEO
If you use Wix's integrated SEO tool, you'll want to apply a similar extension for your WordPress site as well.
One of the most popular SEO plugins for WordPress is Yoast SEO. This plugin will help you optimize all your posts and pages for a target keyword, all while educating you about SEO in the process.
To install Yoast SEO, navigate to Plugins -> Add New and search for Yoast SEO.
Next, install and activate the plugin. Once it is activated, configure Yoast SEO to make the most out of its features.
Set Up Google Analytics
Adding Google Analytics to your WordPress website will help you monitor its performance. It provides you with valuable and detailed information about your site's visitors, including their location, behavior, and traffic sources.
Before you connect Google Analytics to your WordPress site, you have to sign up first. You'll need to log into your Google account and provide details about the site you want to monitor.
The simplest way to connect Google Analytics to WordPress is by installing a plugin. Many Google Analytics plugins are available, including freemium options like MonsterInsights and Analytify or open-source options like Site Kit.
Simply install and activate the Google Analytics plugin of your choice. Then, follow the instructions provided to set it up. MonsterInsights, for example, comes with an intuitive installation wizard.

Double-Check Existing Media and Content
Another necessary step is a final run-through of the website. Errors with formatting and links can happen, but it's essential to fix them and ensure that the site will be fully functional.
Go through each post and page to ensure that everything looks and works the way it's supposed to. Before publishing new content, make sure to preview it first. This will help you catch errors and make sure the formatting will look good once viewed by a visitor.
Speed Up Your Website With WP Rocket
The final step is to make sure that your website loads fast. A slow website can negatively impact user experience and turn traffic away.
To check the current speed of your site, use PageSpeed Insights. If you find that your site's speed is less than ideal, it's vital to fix this issue as soon as possible.
Thankfully, there are WordPress plugins that can significantly cut down on the loading times. WP Rocket is an excellent premium caching plugin that can improve site speed with little to no hassle.

All you have to do is pick a plan, install the plugin, and activate it – no need to worry about adjusting any settings. WP Rocket starts from $49/year with a 14-day money-back guarantee.
Closing Thoughts
Migrating from Wix to WordPress will provide you with many benefits, including a higher degree of both flexibility and control over your website. Even though Wix doesn't make it extremely easy to make the switch, we've covered two methods to do it properly.
First, you need to select a new web host and purchase or transfer your domain name. After you do that, you'll be able to focus on the site's appearance and content.
Using a page builder and recreating pages manually are necessary steps in the Wix to WordPress migration. Also, you need to take additional measures before your new WordPress site goes live, such as SEO optimization and URL redirection.
The migration process requires some effort, but with all that WordPress has to offer, we hope you'll find that it was all worth it. We wish you luck in starting your journey with WordPress.

Hasna is a Content Writer at Hostinger. With passion and knowledge in IT and digital marketing, she hopes to help people solve their problems and succeed. When not writing, she enjoys live music and overanalyzing movies.
How To Add Blog Feed To Another Tab Wix
Source: https://www.hostinger.com/tutorials/wix-to-wordpress/
Posted by: kellyhichly.blogspot.com
0 Response to "How To Add Blog Feed To Another Tab Wix"
Post a Comment